


This is a simple thing really, but for my own practice and to just further make it second nature for myself I think its worth it for me to document the process of setting up a hardhat project. A basic but critical skill for a Web 3 Dev.
First in Terminal or Command Prompt or whatever your OS uses, cd into a folder where you'd like to set up a project. You should be in the folder that you want your project to be in.
You'll need npm and Node.js installed, I'm not going over that here.
Assuming that is installed, then we want to install hardhat to the folder:
npm install --save-dev hardhat
Once Hardhat is installed we need to actually create our hardhat project:
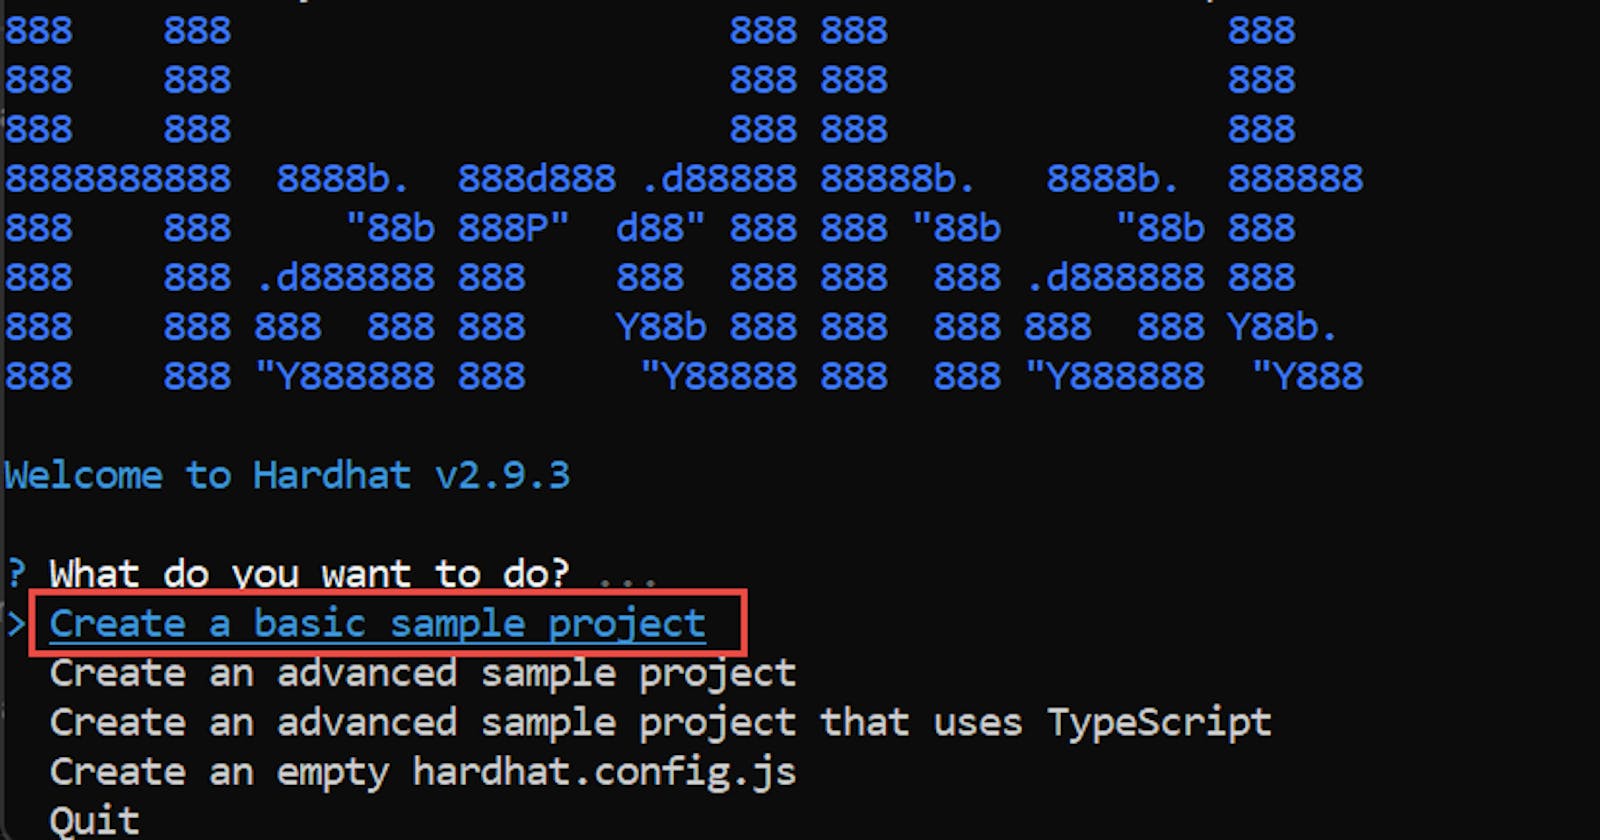
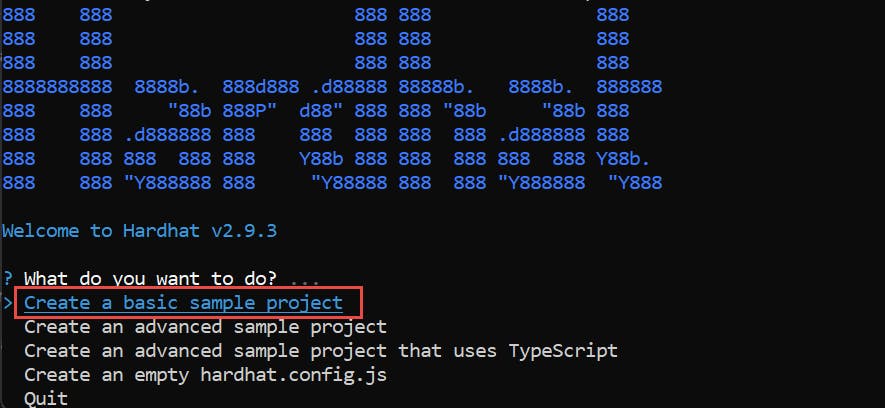
npx hardhat
Then I typically select "Create a basic sample project", once the menu appears because I like the folder structure that gets created with it.
Then specify the project root folder and its best to have a .gitignore (needed for storing .env files with keys we don't want to put on github), but its probably not the most important thing if you don't create it now, because if you connect your hardhat project to a github project I think it can get created at that point too (I'll do this in another post).

Note that if you go with the empty configuration option because you want to do it from scratch then you don't get the folder structure and you can just manually create these two folders (which I find helpful to have):
mkdir contracts
mkdir scripts
mkdir test
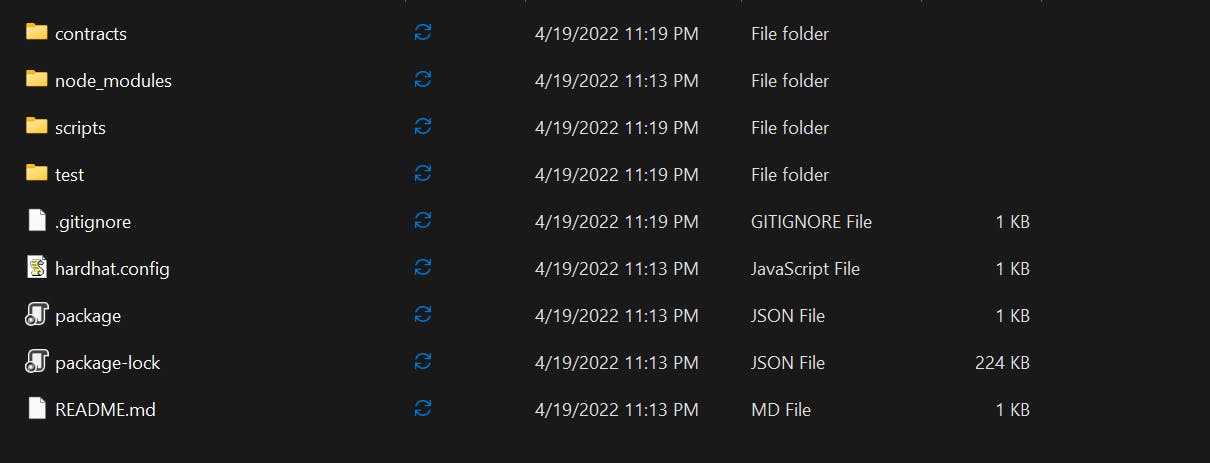
At this point you should have a folder structure that looks like this:
There are still more packages we can install, if we set up a basic project then we see something like this:

Running that command also helps to install Waffle and Chai for testing, and Ethers.js which useful for many things but one thing in particular we'd use it for is deploying contracts.
npm install --save-dev "hardhat@^2.9.3" "@nomiclabs/hardhat-waffle@^2.0.0" "ethereum-waffle@^3.0.0" "chai@^4.2.0" "@nomiclabs/hardhat-ethers@^2.0.0" "ethers@^5.0.0"
We may also may very likely want to use some of OpenZeppelin's Contracts (if we want to make an ERC-20 token or an ERC-721 NFT, or make an upgradable contract or a Governor Contract (or even more things, they have a lot of great stuff I hope to to more posts specifically on them and their contracts). Anyway we can install their package to get their contracts and inherit from them as many Smart Contracts do.
npm install @openzeppelin/contracts
Finally we also want to get dotenv installed to make use of environment variables of keys we don't want to publish to Github (I'll go into this more in a separate post.
npm install --save dotenv
That's really all for now, will go into Github setup and dotenv setup in other posts.
However I do want to mention that if I wanted to make a front end for my project, then my initial steps would be different.
For React front end I could do:
npx create react app <project-directory>
For Next front end I could do:
npx create-next-app <project-directory>
In these cases you start outside of the folder you want your project to be in (different than if you are just setting up Hardhat and no front end, basically in that case you just want to do smart contract development), and is the folder you project will be in. After either of those commands you cd into your project directory. For me I want to focus on building my Solidity skills for the time being, so I'll focus just Hardhat projects for now. Later when I'm more advanced maybe I'll expand my scope to looking at front ends more. After this we'd install hardhat like at the beginning of my instructions and make a basic project and add the other packages. But that beginning step is different.
Just to cite my sources I believe I learned most of these steps from: https://www.web3.university/tracks/create-a-smart-contract/deploy-your-first-smart-contract Which is honestly a great tutorial in general.
And
https://medium.com/coinmonks/react-project-setup-using-hardhat-truffle-part-1-20a596865e